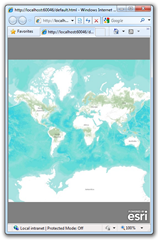
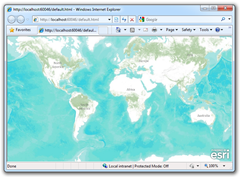
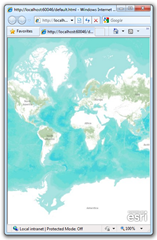
This post describes a technique for calculating an adjusted “full extent” for a layer so that content can uniformly fill a map.
The following XAML will display simple map using ESRI’s ArcGIS API for Silverlight. The map contains the world topo map service from ArcGIS Online.
<UserControl
    x:Class="ESRI.PrototypeLab.DynamicDesign.MainPage"
    xmlns="http://schemas.microsoft.com/winfx/2006/xaml/presentation"
    xmlns:x="http://schemas.microsoft.com/winfx/2006/xaml"
    xmlns:d="http://schemas.microsoft.com/expression/blend/2008"
    xmlns:mc="http://schemas.openxmlformats.org/markup-compatibility/2006"
    xmlns:esri="http://schemas.esri.com/arcgis/client/2009"
    mc:Ignorable="d"
    d:DesignHeight="600"
    d:DesignWidth="800"
    >
    <Grid Background="Gray">
        <esri:Map x:Name="Map">
            <esri:Map.Layers>
                <esri:ArcGISTiledMapServiceLayer
                    ID="topo"
                    Visible="True"
                    Url="http://services.arcgisonline.com/
                         ArcGIS/rest/services/World_Topo_Map/MapServer" />
            </esri:Map.Layers>
        </esri:Map>
    </Grid>
</UserControl>
The code behind below will zoom to the full extent of topo map service.
using System.Windows.Controls;

namespace ESRI.PrototypeLab.DynamicDesign {
    public partial class MainPage : UserControl {
        public MainPage() {
            InitializeComponent();

            // Zoom to full extent
            this.Map.Layers[0].Initialized += (s, e) => {
                this.Map.ZoomTo(this.Map.Layers[0].FullExtent);
            };
        }
    }
}
Depending on the aspect ratio of the browser, this will result in a map with “white space” (or whatever color you use for the background) at either the top/bottom or left/right as shown below.
To address this I extended the Layer class with a method to return an adjusted full extent for the parent map.
using System.Windows;
using ESRI.ArcGIS.Client;
using ESRI.ArcGIS.Client.Geometry;

namespace ESRI.PrototypeLab.DynamicDesign {
    public static class LayerExtension {
        public static Envelope AdjustedFullExtent(this Layer layer,
                                                  FrameworkElement parent) {
            Envelope extent = layer.FullExtent;
            double ratioMap = parent.ActualHeight / parent.ActualWidth;
            double ratioLay = extent.Height / extent.Width;
            if (ratioMap < ratioLay) {
                return new Envelope() {
                    XMin = extent.XMin,
                    YMin = extent.GetCenter().Y - 0.5d * ratioMap *
                           extent.Width,
                    XMax = extent.XMax,
                    YMax = extent.GetCenter().Y + 0.5d * ratioMap *
                           extent.Width
                };
            }
            return new Envelope() {
                XMin = extent.GetCenter().X - 0.5d *
                       extent.Height / ratioMap,
                YMin = extent.YMin,
                XMax = extent.GetCenter().X + 0.5d *
                       extent.Height / ratioMap,
                YMax = extent.YMax
            };
        }
    }
}
Let’s modify the code behind to use the new method, AdjustedFullExtent, defined above.
using System.Windows.Controls;

namespace ESRI.PrototypeLab.DynamicDesign {
    public partial class MainPage : UserControl {
        public MainPage() {
            InitializeComponent();

            // Zoom to full extent
            this.Map.Layers[0].Initialized += (s, e) => {
                this.Map.ZoomTo(
                    this.Map.Layers[0].AdjustedFullExtent(this.Map));
            };
        }
    }
}
Now, when the application starts, the layer will fill the entire map regardless of the browsers aspect ratio.


