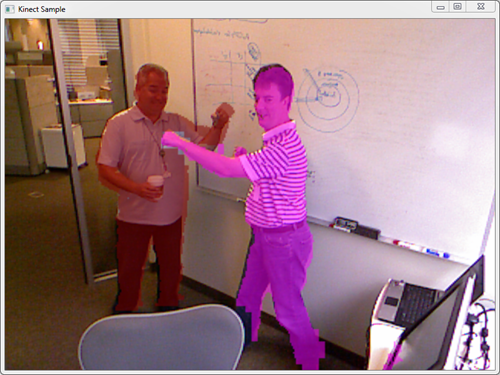
These two good looking gentlemen are demonstrating the blending of kinect's depth and video feeds. Because the depth and video sensors are different resolutions and offset on the device itself there a computation procedure needed to map data one to the other.
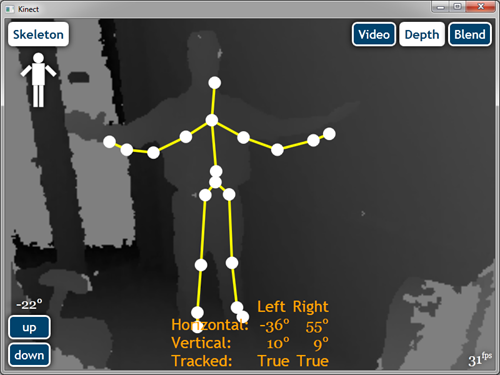
Thankfully Microsoft has provided comprehensive documentation such as the Skeletal Viewer Walkthrough and the Programming Guide for the Kinect for Windows SDK. This post is going to provide simple walkthrough to efficiently map depth sensor pixels, for each person, to the video sensor feed.
This exercise requires:
- Xbox 360 Kinect
- Microsoft Windows 7 (32 or 64bit)
- Microsoft Visual Studio 2010
- Kinect for Windows SDK beta
In Microsoft Visual Studio 2010, create a new WPF application and add a reference to the Microsoft.Research.Kinect assembly. In this exercise the name of the project (and default namespace) is KinectSample.
Add the following code to MainWindow.xaml:
<Window x:Class="KinectSample.MainWindow"
        xmlns="http://schemas.microsoft.com/winfx/2006/xaml/presentation"
        xmlns:x="http://schemas.microsoft.com/winfx/2006/xaml"
        Title="Kinect Sample"
        Height="600"
        Width="800"
        >
    <Grid>
        <Image x:Name="ImageVideo" Stretch="UniformToFill" HorizontalAlignment="Center"
               VerticalAlignment="Center" />
        <Image x:Name="ImageDepth" Stretch="UniformToFill" HorizontalAlignment="Center"
               VerticalAlignment="Center" Opacity="0.5" />
    </Grid>
</Window>
In MainWindows.xaml.cs add the following:
using System;
using System.Windows;
using System.Windows.Media;
using System.Windows.Media.Imaging;
using Microsoft.Research.Kinect.Nui;

namespace KinectSample {
    public partial class MainWindow : Window {
        private Runtime _runtime = null;

        public MainWindow() {
            InitializeComponent();


            this.Loaded += new RoutedEventHandler(this.KinectControl_Loaded);
        }
        private void KinectControl_Loaded(object sender, RoutedEventArgs args) {
            this._runtime = new Runtime();

            try {
                this._runtime.Initialize(
                    RuntimeOptions.UseDepthAndPlayerIndex |
                    RuntimeOptions.UseSkeletalTracking |
                    RuntimeOptions.UseColor
                );
            }
            catch (InvalidOperationException) {
                MessageBox.Show("Runtime initialization failed. " +
                                "Please make sure Kinect device is plugged in.");
                return;
            }

            try {
                this._runtime.VideoStream.Open(
                    ImageStreamType.Video, 2,
                    ImageResolution.Resolution640x480,
                    ImageType.Color);
                this._runtime.DepthStream.Open(
                    ImageStreamType.Depth, 2,
                    ImageResolution.Resolution320x240,
                    ImageType.DepthAndPlayerIndex);
            }
            catch (InvalidOperationException) {
                MessageBox.Show("Failed to open stream. " +
                  "Please make sure to specify a supported image type and resolution.");
                return;
            }

            this._runtime.VideoFrameReady += (s, e) => {
                PlanarImage planarImage = e.ImageFrame.Image;
                this.ImageVideo.Source = BitmapSource.Create(
                    planarImage.Width,
                    planarImage.Height,
                    96d,
                    96d,
                    PixelFormats.Bgr32,
                    null,
                    planarImage.Bits,
                    planarImage.Width * planarImage.BytesPerPixel
                );
            };
            this._runtime.DepthFrameReady += (s, e) => {
                //
                PlanarImage planarImage = e.ImageFrame.Image;
                byte[] depth = planarImage.Bits;
                int width = planarImage.Width;
                int height = planarImage.Height;
                byte[] color = new byte[width * height * 4];
                ImageViewArea viewArea = new ImageViewArea() {
                    CenterX = 0,
                    CenterY = 0,
                    Zoom = ImageDigitalZoom.Zoom1x
                };
                ImageResolution resolution = this._runtime.VideoStream.Resolution;

                for (int y = 0; y < height; y++) {
                    for (int x = 0; x < width; x++) {
                        int index = (y * width + x) * 2;
                        int player = depth[index] & 7;
                        if (player == 0) { continue; }
                        short depthValue =
                            (short)(depth[index] | (depth[index + 1] << 8));
                        int colorX;
                        int colorY;
                        this._runtime.NuiCamera.GetColorPixelCoordinatesFromDepthPixel(
                            resolution,
                            viewArea,
                            x,
                            y,
                            depthValue,
                            out colorX,
                            out colorY
                        );
                        int adjustedX = colorX / 2;
                        int adjustedY = colorY / 2;
                        if (adjustedX < 0 || adjustedX > 319) { continue; }
                        if (adjustedY < 0 || adjustedY > 239) { continue; }
                        int indexColor = (adjustedY * width + adjustedX) * 4;
                        Color[] colors = new Color[]{
                            Colors.Red, Colors.Green, Colors.Blue, Colors.White,
                            Colors.Gold, Colors.Cyan, Colors.Plum
                        };
                        Color col = colors[player - 1];
                        color[indexColor + 0] = (byte)col.B;
                        color[indexColor + 1] = (byte)col.R;
                        color[indexColor + 2] = (byte)col.G;
                        color[indexColor + 3] = (byte)col.A;
                    }
                }

                this.ImageDepth.Source = BitmapSource.Create(
                    width,
                    height,
                    96d,
                    96d,
                    PixelFormats.Bgra32,
                    null,
                    color,
                    width * 4
                );
            };
        }
    }
}
You are done!
This sample will color code the first seven people identified by the kinect device. The most intensive part of this code is the GetColorPixelCoordinatesFromDepthPixel call that maps depth pixels to the video image. To improve performance only pixels identified by the sensor as being a person are mapped. All other depth pixels are ignored.